|
Zum Betrieb einer Leuchtstoffröhre sind drei
Komponenten notwendig:
-
Vorschaltgerät
-
Leuchtstoffröhre
-
Starter
Diese drei Komponenten
müssen zueinander passen und für die vorhandene Betriebsspannung
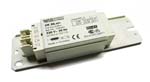
ausgelegt sein. Vorschaltgerät Das Vorschaltgerät
hat zwei Aufgaben: es begrenzt den Strom, so dass sich auf der
Leuchtstoffröhre
die richtige Brennspannung einstellt, und es erzeugt in
Zusammenarbeit mit dem Starter den zum Starten nötigen
Spannungsimpuls.
Das Vorschaltgerät muss für die Betriebsspannung und für die Leistung
der Röhre ausgelegt sein. In den meisten amerikanischen Geräten
werden die Leuchtstoffröhren mit 110V betrieben. Ein bei uns
handelsübliches Vorschaltgerät ist daher nicht geeignet.
Die 110V Vorschaltgeräte sind außerdem in der Regel für 60 Hertz
Netzfrequenz ausgelegt. Beim Betrieb mit 50 Hertz kommt es dadurch
zu einer größeren Erwärmung. Aus diesem Grund ist es unbedingt
notwendig, dass ein
hitzefestes Schild unter dem Vorschaltgerät montiert ist. Bei zu
großer Erwärmung (zu heiß zum Anfassen)
sollte das Vorschaltgerät erneuert werden. Zum einen leiden die
inneren Wicklungen, zum anderen besteht die Gefahr, dass die
Leuchtstoffröhre zerstört wird oder sogar das darunterliegende Holz
anschmort - wenn kein Hitzeschild verwendet wird.
Viele neuere Geräte sind mit 220V / 50 Hz - Vorschaltgeräten
ausgerüstet.
Es gibt auch Vorschaltgeräte mit drei Anschlüssen. Diese haben eine
Art Transformator integriert, der die Spannung etwas erhöht.
Elektronische Vorschaltgeräte (EVG) kommen, soweit wir wissen in
Musikboxen, nicht vor.
Zur Begriffsbestimmung "Vorschaltgerät": früher wurden sog.
Drosselspulen verwendet, bestehend aus Kupfer und Eisen. Sie werden
auch als induktive oder konventionelle Vorschaltgeräte (KVG)
bezeichnet. Zudem gibt es verlustarme Vorschaltgeräten (VVG) und
elektronische Vorschaltgeräten (EVG.
|
|
To operate a
fluorescent lamp three components are needed:
-
Ballast
-
Fluorescent lamp
-
Starter
These three components
need to match each other and be designed for existing operating
voltage. BallastThe ballast has two
functions: It limits the current so that the correct burning
voltage is set on the fluorescent lamp, and it generates the voltage pulse
required for starting in conjunction with the starter.
The ballast must be designed for the operating voltage and the
power of the fluorescent lamp. In most American jukeboxes, the fluorescent
lamps are operated at 110V. A commercially in Europe available ballast is
therefore not suitable.
The 110V ballasts are also generally designed for a mains
frequency of 60 Hertz. When operating at 50 Hertz, this
results in greater heating. For this reason, it is essential
that a heat-resistant shield is fitted under the ballast. If
it becomes too hot (so hot that you can no longer touch it),
the ballast should be replaced. Firstly, the inner windings
will suffer. There is also a risk that the fluorescent lamp
will be destroyed or even the wood underneath will braise -
if no heat shield has been used.
Many newer devices are equipped with 220V / 50 Hz ballasts.
There are also ballasts with three connections. These have a
kind of integrated transformer that increases the voltage
slightly. As far as we know, electronic ballasts (ECG) are
not used in jukeboxes.
To define "ballast": In the past, so-called choke coils were
used, consisting of copper and iron. They are also known as
inductive or conventional ballasts (CCG).
There are also low-loss ballasts (CVG) and electronic
control
ballasts (ECG). |
|
|
|
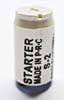
Starter
Der Starter besteht aus einer
Glimmlampe, einem Bimetallschalter und einem Kondensator. Der
Kondensator dient nur zur Funkentstörung, für die Funktion hat
er keine Bedeutung. Trotzdem ist er manchmal kaputt und
bewirkt, dass die Glühfäden dauernd brennen, ohne dass es zu einem
Zündvorgang kommt. Der Starter hat die Aufgabe, den Zündvorgang
einzuleiten. Sobald die Lampe leuchtet, ist er nicht mehr
notwendig. Wenn die Spannung angelegt wird, zündet die
Glimmlampe und erwärmt den Bimetallschalter bis dieser
schließt.
Dadurch wird der Stromkreis Vorschaltgerät - Heizfaden 1 -
Starter - Heizfaden 2 geschlossen und die Röhre beheizt.
Die Glimmlampe wird kurzgeschlossen und erlischt. Nach
kurzer Zeit öffnet der Bimetallschalter und unterbricht den
Strom. Dabei entsteht im Vorschaltgerät, ähnlich wie die
Zündspule im Auto, ein sehr hoher Spannungsimpuls, der die
Ionisation des Gases in der Lampe einleitet. Ist das Gas
ionisiert, genügt eine relativ geringe Spannung (die
Brennspannung) um die Ionisation aufrecht zu erhalten. Die
Brennspannung liegt auch wieder am Starter, ist aber zu gering,
um ihn zu zünden.
Die meisten bei uns erhältlichen Starter haben eine relativ hohe
Zündspannung. Für 110 Volt sind (abgesehen von den original US -
Startern, die natürlich für 110 V geeignet sind) nur Starter
geeignet, die eine Aufschrift haben "110 - 240 Volt" und / oder
"Series 240V" oder ähnlich haben. Diese Starter sind auch für
den Betrieb von zwei Leuchtstoffröhren in Serie geeignet. Die
Typenbezeichnungen sind je nach Erzeuger unterschiedlich und
geben nicht immer Aufschluss über die erlaubte Betriebsspannung.
Es gibt auch elektronische Starter, die wesentlich schneller uns
sicherer zünden als die herkömmlichen. Sie sind ziemlich teuer,
schonen aber die Leuchtstoffröhre. Es sind aber, genau wie bei
den herkömmlichen, nicht alle für 110 V - Betrieb geeignet.
Wenn ein Starter nicht mehr richtig funktioniert (Lampe glüht
ständig vor oder glimmt nur an den Enden), dann kann ein "klebender"
Bimetallkontakt Ursache sein. Mitunter kann man ihn dann durch
vorsichtiges Klopfen am Gehäuse wiederbeleben; der Austausch
bleibt aber natürlich die sichere Variante.
Die Angabe der
Betriebsspannung bei Startern führt gelegentlich zu Missverständnissen.
Entscheidend sind daher Betriebsspannung und Startertyp (bzw. die Art
der verwendeten Schaltung). Beispiele:
-
110V SINGLE: für eine Lampe an 110V
gebaut
-
230V SINGLE: für eine Lampe an 230V
gebaut
-
230V SERIE: entweder für eine Lampe an
115V oder für ZWEI Lampen (Tandemschaltung) in Reihe an 230V
Anmerkung: In Ländern mit 110/115V Netzspannung entfällt die
Bezeichnung SINGLE meistens, da die Tandemschaltung hier ohnehin
nicht möglich ist.
|
|
Starter
The starter consists of a glow lamp, a bimetal switch and a
capacitor. The capacitor is only used for interference
suppression, it has no significance for the function.
Nevertheless, it sometimes breaks and causes the filaments to
burn continuously without an ignition process taking place. The
starter has the function to initiate the ignition process. As
soon as the fluorescent lamp is illuminated, it is no longer
necessary. As soon as the voltage is applied, the glow lamp
ignites and heats the bimetal switch until it closes.
This closes the circuit ballast - filament 1 - starter -
filament 2 and the fluorescent lamp is heated. The glow lamp is
short-circuited and goes out. After a short time, the bimetal
switch opens and interrupts the current. This creates a very
high voltage pulse in the ballast, similar to the ignition
solenoid in a car, which initiates the ionisation of the gas in
the fluorescent lamp. As soon as the gas is ionised, a
relatively low voltage (the burning voltage) is sufficient to
maintain ionisation. The burning voltage is also present at the
starter, but is too low to ignite it.
Most of the starters available in the EU have a relatively high
ignition voltage. For 110 volts (apart from the original US
starters, which are of course suitable for 110 V), only starters
labelled "110 - 240 volts" and/or "Series 240V" or similar are
suitable. These starters are also suitable for operating two
fluorescent tubes in series. The type designations vary
depending on the manufacturer and do not always provide
information about the permitted operating voltage. There are
also electronic starters that ignite much faster and more
reliably than conventional ones. They are quite expensive, but
protect the fluorescent tube. However, just as with conventional
starters, not all of them are suitable for 110 V operation.
If a starter no longer works properly (lamp glows constantly or
glows at the ends only), the cause may be a "sticking"
bimetallic contact. Sometimes it can be revitalised by carefully
tapping the housing; however, replacement is of course the
safest option.
The
specification of the operating voltage for starters occasionally
leads to misunderstandings. The operating voltage and starter
type (or the type of circuit used) are therefore decisive.
Examples:
-
110V
SINGLE: Built for a lamp at 110V
-
230V
SINGLE: Built for one lamp at 230V
-
230V
SERIES: Either for one lamp at 115V or for TWO lamps (tandem
circuit) in series at 230V
Note: In countries with 110/115V mains voltage, the
designation SINGLE is usually omitted, as tandem switching
is not possible here anyway.
|
|
|
|
Leuchtstoffröhre
Die Leuchtstoffröhre hat keine Spannungsangabe - also weder
110 noch 220V. Die benötigte Brennspannung stellt sich in
Verbindung mit dem Vorschaltgerät automatisch ein. Die
Brennspannung ist je nach Röhrentyp, Leistung und Länge in
der Größenordnung von 50 - 70 Volt. Sie verändert sich im
Lauf der Lebensdauer. Am Ende der Lebensdauer ist sie so
hoch, dass die Zündspannung des Starters überschritten wird
und das bekannte Flackern entsteht. Für die Zündung ist es
notwendig, dass das Gas erhitzt wird (durch die Heizfäden an
den Enden) und danach ein Hochspannungsimpuls aus
dem Vorschaltgerät kommt, der den Ionisationsvorgang
einleitet.
Es gibt auch noch andere Zündungsmethoden, z. B. mit
Hochfrequenz, diese kommen aber bei Musikboxen nicht vor.
Nach einigen hundert Betriebsstunden beginnt schon der
Alterungsprozess und die Helligkeit lässt langsam, aber
sicher nach. Der Alterungsprozess wird auch durch oftmaliges
Starten beschleunigt.
Die Lebensdauer wird vom Zustand der Oxydbeschichtung auf
den Glühwendeln der Leuchtstofflampe bestimmt. Diese
Beschichtung hat die Aufgabe, den Übergangswiderstand
zwischen Elektrode und Gasfüllung so niedrig wie möglich zu
halten. Bei jedem Zündversuch platzen nun einige Partikel
davon ab (erkennbar als sich langsam einstellende schwarze
Färbung an den Enden der Röhren, wo sich diese Partikel
niederschlagen). Irgendwann ist dann der Widerstand zu groß
geworden, die Ionisation im Gas bricht nach dem Zündversuch
wieder zusammen, und die Röhre geht sofort wieder aus. Das
Ergebnis ist dann das allseits bekannte "Flackern", also
sich wiederholende, erfolglose Zündversuche.
Es gibt Leuchtstofflampen in verschiedenen Durchmessern, die
oft als T5, T8 und T12 angegeben werden.
|
|
Fluorescent lamp
The fluorescent lamp has no voltage specification - i.e.
neither
110 nor 220V. The required burning voltage is set automatically in conjunction with the ballast.
Depending on the type of fluorescent tube, wattage and length, the
burning
voltage is about in
the order of 50 - 70 volts. It changes within its the life cycle. At the end of this
life cycle, it is
so
high that the ignition voltage of the starter is exceeded
and the familiar flickering occurs. For ignition it is necessary
that the gas is heated (by the filaments at the ends) and then a high-voltage pulse is emitted from the
ballast which initiates the ionization process.
There are also other ignition methods, e.g. with
high frequency, but these do not occur in jukeboxes.
After a few hundred hours of operation, the ageing process begins and the brightness slowly but surely decreases.
The ageing process is also accelerated by starting often.
The service life is determined by the condition of the oxide
coating on the filaments of the fluorescent lamp. The function
of this coating is to keep the contact resistance between the
electrode and the gas filling as low as possible. With each
ignition attempt, some particles of this coating burst off (recognizable
as a slowly appearing black coloration at the ends of the tubes
where these particles are deposited). At some point, the
resistance becomes too great, the ionization in the gas
collapses again after the ignition attempt and the tube goes out
again immediately. The result is the well-known "flickering",
i.e. repeated, unsuccessful ignition attempts.
Fluorescent lamps are available in different diameters, which
are often specified as T5, T8 and T12. |
|
T5: 15 mm |
T8: 26 mm |
T12: 38 mm |
 |
|
|
Leuchtstofflampen gibt es in verschiedenen Lichtfarben - je
nach Einsatz. Unterschieden wird in Standard-, Spezial-, Dreibanden-
und Vollspektrumlichtfarben. In Musikboxen wurden i.d.R. Lampen mit
der Lichtfarbe cool white (CW) verwendet. Es gibt jedoch einige
Ausnahmen, Z.B. Seeburg Fleetwood, die Schwarzlicht verwendete. Die
Lichtfarben werden unterteilt in Tageslicht (Daylight), Kühles Weiß
(cool white), Weiß (white), Universelles Weiß (universal white) und
Warmes Weiß (warm white). Sie werden in Form von Werten (Zahlen) auf
den Leuchtstofflampen angegeben. Je nach Hersteller werden
unterschiedliche Werte dafür verwendet.
Hier eine Beispielübersicht: |
|
Fluorescent lamps are
available in different light colours - depending on the
application. A difference is made between standard, special,
three-band and full spectrum light colours. In jukeboxes, lamps
with the light colour cool white (CW) are generally used.
However, there are some exceptions, e.g. Seeburg Fleetwood,
which used black light. The light colours are divided into
daylight, cool white, white, universal white and warm white.
They are specified in the form of values (numbers) on the
fluorescent lamps. Different values are used depending on the
manufacturer.
Here is an example overview: |
|
Name |
Kürzel / Short |
Allgemein / General |
Sylvania |
Philips |
Osram |
|
Daylight |
D |
765 / 850 |
154 or 850 |
54 |
10-765 or 16-850 |
|
Cool White |
CW |
640 / 840 |
133 or 840 |
33 or 840 |
20-640 or 21-840 |
|
White |
W |
535 / 835 |
135 or 835 |
35 or 835 |
23-535 or 21-835 |
|
Warm White |
WW |
530 / 830 |
129 or 830 |
29 or 830 |
30-530 or 31-830 |
|
Universal White |
UW |
740 |
25 |
25 |
25-740 |
|
|
Je nach Hersteller findet man demnach
unterschiedliche Angaben auf den Lampen. Auf einigen findet man nur
die Leistung (Watt) und Lichtfarbe, auf anderen noch die Angabe zur
Länge.
Bsp. Philips TL 18-640: Leuchtstofflampe, 18W, Cool White
Bsp. Sylvania F25-28/12 CW: Leuchtstofflampe 25 Watt, 28"
(Zoll), Durchmesser 38 mm, cool white |
|
Depending on the
manufacturer, you will therefore find different information on
the lamps. On some you will only find the wattage and light
colour, on others the length.
E.g. Philips TL 18-640: Fluorescent lamp, 18W, Cool White
E.g. Sylvania F25-28/12 CW: Fluorescent lamp 25 Watt, 28"
(inch), diameter 38 mm, cool white |
|
! |
Die Erfahrung zeigt: Keine Regel ohne Ausnahme.
Vor allem bei Rock-Ola Musikboxen zeigt sich, dass sich dicke 25W
T12 Leuchtstofflampen nicht durch dünne 25W T8 ersetzen lassen. Sie flackern
nur, zünden nicht, auch wenn Starter
und Vorschaltgerät von den Werten her passen. Dagegen zündet
eine dünne T8 in 18 Watt schon.
Im Rahmen der Originalität und wenn man die volle Lichtleistung in
der Musikbox möchte, empfiehlt es sich daher 25 Watt Lampen in T12 zu
verwenden. |
! |
Experience shows
that there is no rule without exception.
Especially with Rock-Ola jukeboxes, we have found that thick
T12 fluorescent lamps in 25W cannot be replaced with thin T8
25W lamps. They only flicker and do not ignite, even if the
starter and ballast match the values. Interestingly, a thin
(T8) 18 watt fluorescent lamp ignites.
Within the scope of originality and if one wants the full
light output in the jukebox, it is therefore advisable to
use 25W lamps in T12.
|
! |
|
|
Im Normalbetrieb liegt die
Leuchtstoffröhre in Reihe mit dem Vorschaltgerät, früher Drosselspule. In dem
Moment ist sie noch abgeschaltet.
Wird die Schaltung nun
eingeschaltet, liegt fast die komplette Spannung am Starter. Dieser
erwärmt sich und darin verbiegt sich ein Bimetall, bis dieses im Starter
einen Kurzschluß erzeugt - die beiden Elektroden im Starter kommen
zusammen. Nun fließt ein recht hoher Strom durch das Vorschaltgerät und
die Heizfäden - die Leuchtstoffröhre glüht vor, die Heizfäden erwärmen sich.
Zusätzlich baut sich in dem Vorschaltgerät ein Magnetfeld auf. Der
Starter kühlt nun in dieser Zeit wieder ab, die Bimetallelektroden
bewegen sich wieder auseinander und der Kurzschluss der Elektroden
verschwindet.
In diesem Moment wird der hohe Vorheizstrom in den Elektroden
unterbrochen - das Magnetfeld im Vorschaltgerät bricht zusammen und
erzeugt eine hohe Impulsspannung. Diese liegt an der Röhre an, die Röhre
zündet und beginnt zu leuchten. Das Vorschaltgerät begrenzt nun nur noch
den Strom durch die Röhre, wirkt wie ein Vorwiderstand - dabei wird die
Drossel warm.
Da die Brennspannung an
der Röhre niedriger ist als die Zündspannung der Röhre, bleibt dieser
kalt und hat während des Normalbetriebes keine Wirkung mehr - man könnte
diesen - nach dem Zünden der Röhre - auch entnehmen.
Zum Problem der dünnen
und dicken Lampen
Das Problem ist nun, das vor allem lange, dünne Leuchtstoffröhren (T8)
in alten Fassungen für dicke Leuchtstoffröhren (T12) oft nicht
zünden, z.B. eine dünne T8 25W statt einer dicken T12 25W. Das liegt einmal daran, dass die notwendige Zündspannung steigt,
je dünner und je länger die Röhre wird. Zusätzlich hat ein
konventionelles oder verlustarmes Vorschaltgerät an 110V weniger
Zündspannung als eines an 220 / 230V.
Man kann bei 230V
problemlos eine dicke 65 Watt Leuchtstoffröhre T12 durch eine moderne 58 Watt
in T8 ersetzen, das klappt immer. Das geht dann erst recht bei 40/36Watt
oder 20/18 Watt. Bei 110V klappt das oft auch noch bei 20/18 Watt - die
60cm Röhren sind da eher unproblematisch.
Die US 25 Watt Leuchtstoffröhren sind da aber viel kritischer. Eine
moderne 25 Watt zündet am "alten" Vorschaltgerät an 110 Volt nicht, die
Zündspannung ist zu gering. Die Röhre versucht immer wieder zu zünden, flackert
aber nur.
Längere T5-Röhren lassen sich nur noch mit elektronischem Vorschaltgerät
(EVG) zünden, dafür gab es nie induktive Vorschaltgeräte
(Drosselspulen). Zudem ist das EVG energiesparender.
Mögliche Abhilfe:
Abhilfe, wenn man die alten Fassungen behalten möchte oder muss:
-
"Dicke" T12 Originalröhre
besorgen, Rest bleibt. Starter immer gleich mit ersetzen - und den
richtigen verwenden.
-
"Dünne" T8 - Röhre
besorgen, aber dann passendes Vorschaltgerät für die T8-Röhre
ebenfalls verwenden (passend zur Betriebsspannung!)
-
Elektronisches
Vorschaltgerät verwenden, passend zur Betriebsspannung 110 oder
230V. Die Fassung muss neu verdrahtet werden, der Starter erübrigt
sich.
-
LED-Röhre verwenden, ebenfalls passend zur Betriebsspannung 110 oder
230V. Ein Starterersatz liegt in der Regel bei, bei einigen Typen
ist eine Neuverdrahtung notwendig. Sieht in manchen Musikboxen prima
aus und bewirken weniger Wärme und Stromverbrauch. Bei anderen
Musikboxen jedoch ist die Ausleuchtung nicht ausleuchtend genug. LED
Röhren leuchtet nicht ringsherum - 360 Grad, sondern oft nur 180
oder weniger Grad.
Zusätzlich kann es nicht schaden, sich LED-Röhren generell einmal genau anzusehen. Inzwischen gibt
es welche, die optisch fast nicht mehr vom Original zu unterscheiden
sind. Andere lassen einzelne LEDs sehr hell erscheinen, dazwischen sind
dunkle Stellen. Es gibt riesige Unterschiede. Im Zweifelsfall sollte
lieber die teurere OSRAM oder PHILIPS genommen werden. China-Ware kann
gut sein - oder auch nicht.
Im Laufe der Zeit kommt unser Sammelgebiet allerdings kaum drumherum, sich mit LED Lampen zu beschäftigen. Denn die Verordnung im
Rahmen der Energieeinsparung lässt nur noch den Verkauf von altem
Lagerbestand zu. Neuproduktionen und Importe in die EU wird es dann
nicht mehr geben. |
|
In normal operation, the
fluorescent tube is in series with the ballast, formerly the choke coil.
At that moment it is still switched off.
If the circuit is now switched on, almost the entire voltage is applied
to the starter. This heats up and a bimetal in it bends until it creates
a short circuit in the starter - the two electrodes in the starter come
together. A fairly high current now flows through the ballast and the
filaments - the fluorescent tube glows and the filaments heat up. In
addition, a magnetic field builds up in the ballast. The starter now
cools down again during this time, the bimetal electrodes move apart
again and the short circuit between the electrodes disappears.
At this moment, the high preheating current in the electrodes gets
interrupted - the magnetic field in the ballast collapses and generates
a high pulse voltage. This is applied to the fluorescent tube, the
fluorescent tube ignites and starts to light up. The ballast now only
limits the current through the fluorescent tube, acting like a series
resistor - the choke becomes warm in the process.
As the burning voltage at the fluorescent tube is lower than the
ignition voltage of the fluorescent tube, this remains cold and no
longer has any effect during normal operation - it could also be removed
after the fluorescent tube has been ignited.
The problem with thin and
thick lamps
The problem is that especially long, thin fluorescent tubes (T8) in old
sockets for thick fluorescent tubes (T12) sometimes do not ignite, e.g.
a thin T8 25W instead of a thick T12 25W. One reason for this is that
the thinner and longer the tube, the higher the required ignition
voltage. In addition, a conventional or low-loss ballast at 110V has
less ignition voltage than one at 220 / 230V.
At 230V you can easily replace a thick 65 watt T12 fluorescent tube with
a modern 58W T8 tube, this always works. This works even better with
40/36 watts or 20/18 watts. With 110V, this often also works with 20/18
watts - the 60cm fluorescent tubes are rather troublefree.
The US 25 watt fluorescent tubes are much more critical, a modern
25 watt does not ignite on the "old" ballast at 110 volts, the ignition
voltage is simply too low. The fluorescent tube keeps trying to ignite,
but only flickers.
Longer T5 tubes can only be ignited with an electronic ballast (ECG);
inductive ballasts (choke coils) were never available for this purpose.
The electronic ballast (ECG) is also more energy efficient.
Possible remedy:
Remedy if you want to keep or have to keep the old sockets:
-
Get a "thick" T12 original
fluorescent tube, keep the rest. Always replace the starter at the
same time - and use the correct one.
-
Get a "thin" T8 tube, but
then also use a suitable ballast for the T8 tube (suitable for the
operating voltage!)
-
Use an electronic ballast
suitable for the 110 or 230V operating voltage. The socket must be
rewired, the starter is not required.
-
Use LED tube, also suitable
for operating voltage 110 or 230V. A starter replacement is usually
included, rewiring is necessary for some types. Looks great in some
jukeboxes and results in less heat and power consumption. In other
jukeboxes, however, the illumination is not bright enough. LED tubes
do not illuminate all around - 360 degrees, but often only 180
degrees or less.
In addition, it can't hurt to
take a closer look at LED tubes in general. There are now some that are
almost indistinguishable from the original fluorescent lamps. Others let
individual LEDs appear very bright, with dark areas in between. There
are huge differences. If in doubt, it is better to go for the more
expensive OSRAM or PHILIPS LED lamps. Chinese ones can be good - or not.
In the course of time, however, with our collectables we hardly will be
able to avoid dealing with LED lamps. This is because the regulation on
energy saving will only allow the sale of old stock. New production and
imports into the EU will then no longer be possible.
|
.gif)