|
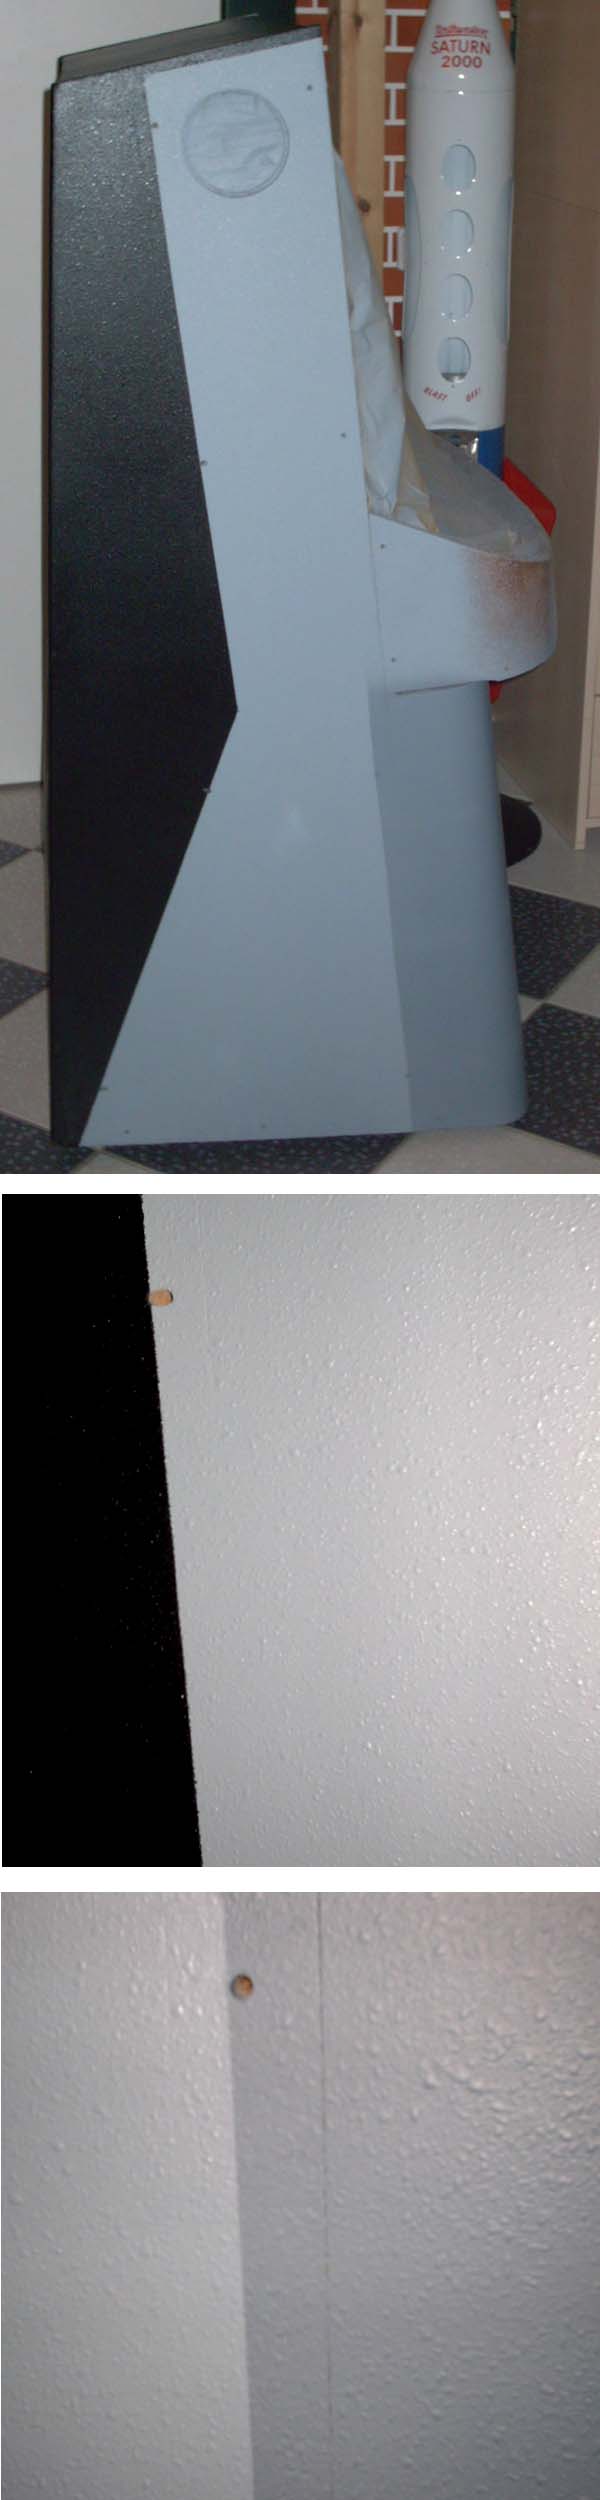
Habe gerade meine Teleramic komplett lackiert, ist bis auf
die Farbgestaltung identisch.
Ist aber leider eine Arbeit für den Profi.
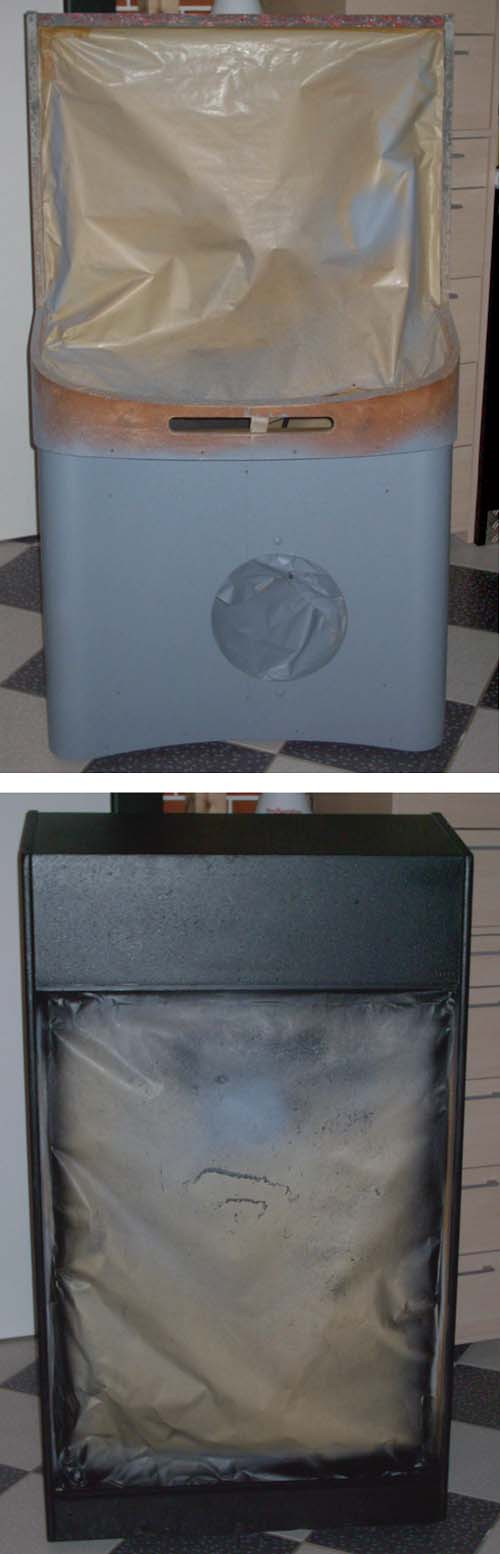
Erstmal zum Original:
Die Struktur wurde aufgebracht wegen der schlechten und saugenden
Untergrundqualität.
Bei meiner Musikbox war kein Füller vorlackiert, sondern der Decklack war ein
Füller. D.h., es war ein matter eingefärbter Füller (oder ein
Zwitterprodukt) - ob Einkomponenten oder Zweikomponenten Material kann man
nach ca. 50 Jahren nicht mehr sagen. Die Struktur ist eine Art Antidröhn
und wurde mit einer Unterbodenschutzpistole lackiert. Man sieht es an der
Farbe der Narbung und daran das das Zeug beim Schleifen weich wird.
Also
1. Schicht farbig
2. Schicht Struktur
3. Schicht farbig
Wichtig ist, er ist geeignet für jeden 2 K Füller bzw. Decklack.
Jetzt zum Arbeitsprozess:
Alte Decklackschicht soweit möglich entfernen bzw. soweit schleifen, dass
keine alte Struktur mehr zu sehen oder zu fühlen ist. Man nimmt P120 auf
einem Exzenter oder Rutscher.
Es wird passieren das sich das Papier zusetzt, deshalb öfter wechseln.
Reinigen mit Silikonentferner.
Dann habe ich einen 2K Füller verwendet, der ohne Verdünnung der mit einer
Polyesterpistole aufgetragen wird, Düsengröße 2 mm.
Der Druck des Deckganges bleibt normal wie beim Füllern, die Struktur nach
völligem Antrocknen des Füllers wird mit ca. 0,3-0,5 bar aufgetröpfelt,
Abstand ca. 30 cm.
Ohne Verdünnung und mit zu wenig Druck kann das Material nicht verfließen,
das soll es ja auch nicht.
Man kann nun jede Farbe nach Abtrocknen und Aushärten nach und nach
lackieren.
Die Struktur ist nicht vom Original zu unterscheiden. |
|
I have just completely
repainted my Teleramic, it is identical except for the colour scheme.
Unfortunately, it's a job for a professional.
Firstly, the Original: The texture was applied because of the
poor and absorbent surface quality.
My jukebox was not pre-coated with a filler, but the topcoat was a
filler. In other words, it was a matt coloured filler (or a hybrid
product) - after around 50 years, it is no longer possible to say
whether it was a one-component or two-component material. The structure
is a kind of anti-drumming and was painted with an undersealing gun. You
can tell by the colour of the grain and the fact that it gets soft when
being sanded. So
1st layer: Coloured
2nd layer: Structure
3rd layer: Coloured
The important thing is that it is suitable for any 2 K filler or top
coat.
Now for the work process:
Remove the old top coat as far as possible or sand it so that no old
structure can be seen or felt. Use P120 on an random orbital sander.
It will happen that the paper becomes clogged, so change it more often.
Clean with silicone remover.
Then I used a 2K filler, without thinner, which is applied with a
polyester gun, nozzle size 2 mm.
The pressure of the top coat remains normal as with the filler, the
structure is dripped on with approx. 0.3-0.5 bar after the filler has
completely dried, distance approx. 30 cm.
Without a thinner and with too little pressure, the material cannot flow,
nor should it.
After drying and hardening, any
colour now can be painted step by step. The structure is
indistinguishable from the original. |