Seeburg Jukeboxes & Wallboxes im Archiv von Jukebox-World

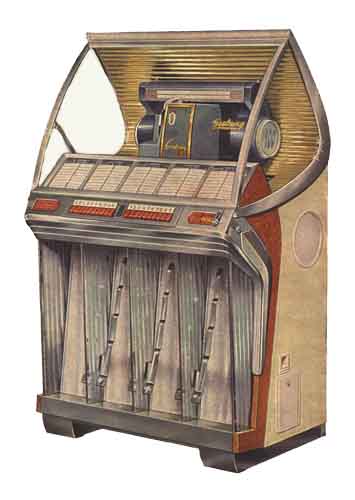
Seeburg HF100R (1954)   •••   HF100RD    •••   Hideaway HHF100R
Accessories

Copyright

Introduced in August 1954
aka Bandshell;
100 selections
BB Aug 21, 1954: "... the last word in musical reproduction. Omni directional sound means music in all directions."

HF100R (1954)

HF100R


HF100R

HF100RD = Dime Play

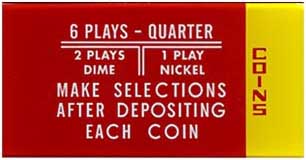
Model HF100R was set up for
1 Play = Nickel (5 cent)
3 Plays = Dime (10 cent)
6 Plays = Quarter (25 cent)
HF100R

Model HF100RD was set up for
1 Play = 2x Nickel (5 cent) or 1x Dime (10 cent)
3 Plays = Quarter (25 cent)

HF100R


Booklet HF100R, reprint

Technische Daten - Specifications
 

HF100R

HF100RD

Wahlen / Selections 100 100
Gehäuse / Cabinet Sea Mist & Olive Burl Plastic Veneer Sea Mist & Olive Burl Plastic Veneer
Lampen / Lamps Cabinet: TL 25W/33"/T12   |   Record indicator: 2x #44 Mechanisms: # 81   |   Credit: 2x # 47 Cabinet: TL 25W/33"/T12   |   Record indicator: 2x #44 Mechanisms: # 81   |   Credit: 2x # 47
Verstärker / Amplifier MRA5-L6: 5879, 6SN7GT, 6SK7, 6SL7GT,12AX7 / ECC 83, 6L6G (2), 5U4GB / GZ 34, 2050
Frequency: 20Hz to 25,000Hz
MRA5-L6: 5879, 6SN7GT, 6SK7, 6SL7GT,12AX7 / ECC 83, 6L6G (2), 5U4GB / GZ 34, 2050
Frequency: 20Hz to 25,000Hz
Receiver WSR7-L6 (110V)
EWSR7-L5 (220V)
WSR7-L6D (110V)
EWSR7-L5 (220V)
Mechanismus / Mechanism 145S14-L6 145S14-L6
Electrical Selector ES11-L6 ES11-L6
Tormat - -
Münzprüfer / Slug rejector 5-, 10-, and - 25-cent Single Entry: Originally set up for
1 Play = Nickel (5 cent)
3 Plays = Dime (10 cent)
6 Plays = Quarter (25 cent)
5-, 10-, and - 25-cent Single Entry with Nickel Diverter: Originally set up for
1 Play = 2x Nickel (5 cent) or 1x Dime (10 cent)
3 Plays = Quarter (25 cent)
Kreditgerät / Credit unit CCU-3-L6 CCU-3-L6
Lautsprecher / Speaker Permoflex, Jensen, Utah: 2x 12" 8 Ohm – AlNiCo
2x 8" 8 Ohm – AlNiCo
1x 5"
8 Ohm High Frequency
Permoflex, Jensen, Utah: 2x 12" 8 Ohm – AlNiCo
2x 8" 8 Ohm – AlNiCo
1x 5"
8 Ohm High Frequency
Tonabnehmer / Cartridge Seeburg Readhead (mono) Seeburg Readhead (mono)
Sicherungen / Fuses 1x1A slo blo, 1x 2A slo blo, 1x 3A , 1x 5A, 1x 3A Fustat 1x1A slo blo, 1x 2A slo blo, 1x 3A , 1x 5A, 1x 3A Fustat
Schlüssel / Key F279 F279
Abmessungen / Size H 58-3/4" x W 35-1/2" x D 26-3/4"   |   Weight 337 lbs H 58-3/4" x W 35-1/2" x D 26-3/4"   |   Weight 337 lbs
Zubehör / Accessories Wallbox 3W1
Extra speaker
HFCV1-12, HFCV2-8, HFCV3-8
Remote Volume Control MRVC1
Microphone Preamplifier Kit PAK3-L56
Extra Needle Brush
Aux. Amplifier HFA1
Wallbox 3W1D
Extra speaker
HFCV1-12, HFCV2-8, HFCV3-8
Remote Volume Control MRVC1
Microphone Preamplifier Kit PAK3-L56
Extra Needle Brush
Aux. Amplifier HFA1
Besonderheiten / Features Aka Bandshell Aka Bandshell


HF100RD

- Pictures courtesy of Justin Shetler -
Three different speaker brands had been used by Seeburg: Permoflex (see below), Jensen, Utah

HF100R

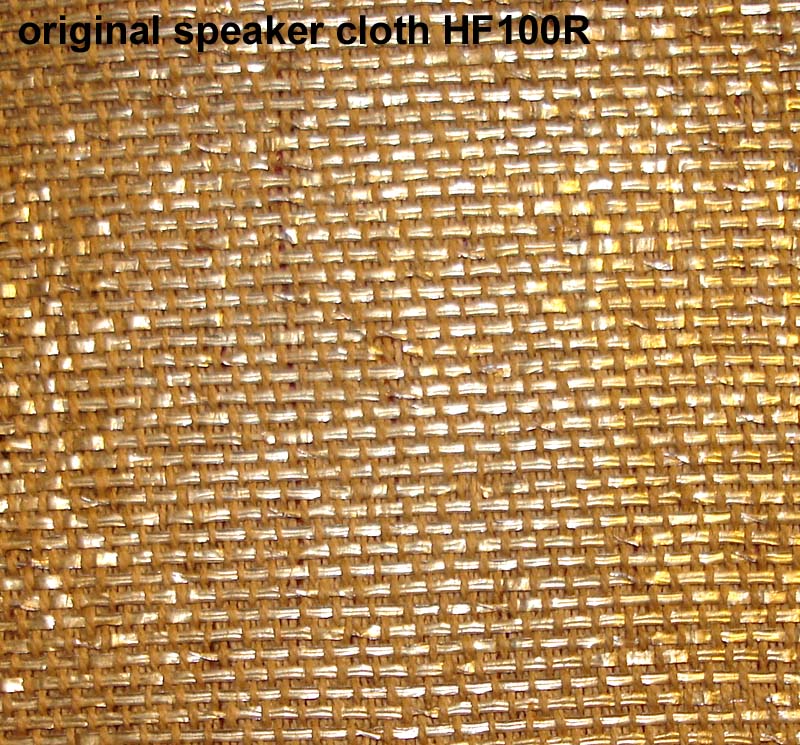
Original Speaker Cloth
HF100R


Abnehmen des Grillstoffes ohne die Leiste zu beschädigen.   Removing the grill cloth without damaging the metal trim.

Als erstes die fünf Grillgläser ausbauen.
Die Leiste ist nur gesteckt. Um sie anzuheben, vorsichtig mit einem langen Schraubenzieher durch die Fräsungen der fünf vorderen Scheiben.
Man kommt unterhalb der Leiste raus, und kann diese dann Stück für Stück hochdrücken. M.E. der einzige Weg die obere Kante der Leiste nicht zu beschädigen.


First, remove the five grille glasses.
The metal bar is only plugged in. To lift it, carefully go through the grooves of the five front glasses with a long screwdriver.
the scewdriver gets out from underneath the bar. Then push it up piece by piece. In my opinion, this is the only way to avoid damaging the upper edge of the bar.


Ausbau einer oder aller Grillscheiben (Waffelmuster)   Removing one or all grille (waffle pattern) glasses
1. Tastatur ausbauen (nicht die Mechanik, nur die Tasten an sich).
2. Blauen Licht Diffuser ausbauen oder zumindest so weit lösen, dass man diesen anheben kann .
3. Defekte Grillscheibe leicht anheben und dann heraus fummeln.

Ausbau Tastatur
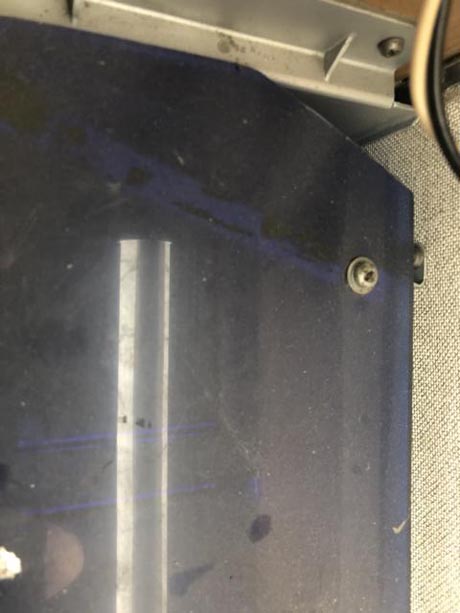
Bild 1
Die große Schraube muss raus, die kleine hält nur das rote Abdeckblech. Hier ist auch nur eine große Schraube zu sehen, sollten eigentlich zwei sein auf jeder Seite der Tastatur Mechanik.
Achtung: die Tastatur ist in Langlöchern zur Justage angeschraubt. Das muss später mit ein bisschen Gefühl wieder angepasst werden.
 

Ausbau blauer Lichtdiffuser
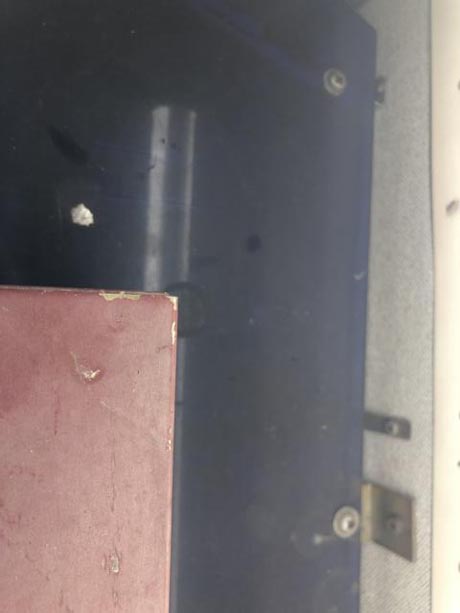
Bild 2 zeigt die linke der beiden Schrauben die jeweils an dem linken und rechten Trichter den blauen Diffuser halten. Die muss raus.

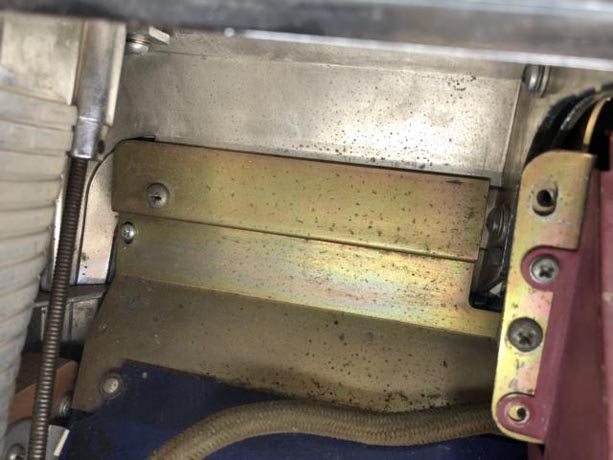
Bild 3 zeigt eine der beiden Gewindeschrauben die eher mittig an der Lautsprecherwand sitzen. Die müssen auch beide raus. Nicht den Winkel von der Lautsprecherwand abschrauben. Alles bitte mit sehr viel Gefühl da der Diffuser meistens alt und brüchig ist .

  1. Remove the keyboard (not the mechanism, just the buttons themselves).
2. Remove the blue light diffuser, or at least loosen it enough so that you can lift it up.
3. Gently lift the broken glass panel and then carefully pry it out.

Removing the keyboard
Photo 1
The large screw needs to be removed; the small one only holds the red cover in place. Only one large screw is visible here, but there should actually be two on each side of the keyboard mechanism.
Attention: The keyboard is secured with screws in slotted holes for adjustment. This will need to be readjusted later with a bit of care.
 

Removing the blue light diffuser
Photo 2 shows the left of the two screws that secure the blue diffuser to the left and right funnels. This one needs to be removed.

Photo 3 shows one of the two threaded screws located more towards the center of the speaker panel. Both of these must also be removed. Do not unscrew the bracket from the speaker panel. Please proceed with great care, as the diffuser is usually old and brittle.

1.
HF00R Ausbau Grillscheiben

2.
HF00R Ausbau Grillscheiben

3
.HF00R Ausbau Grillscheiben

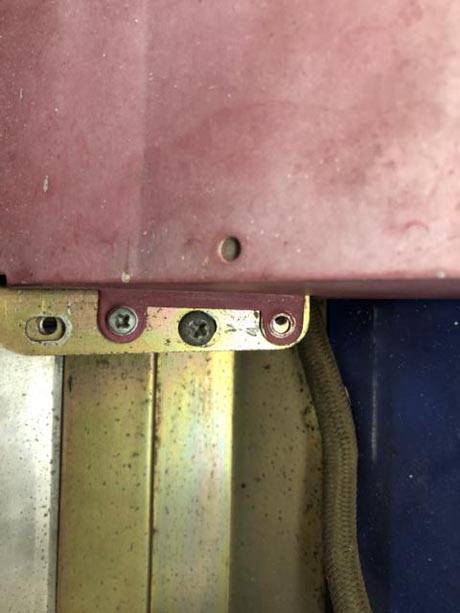
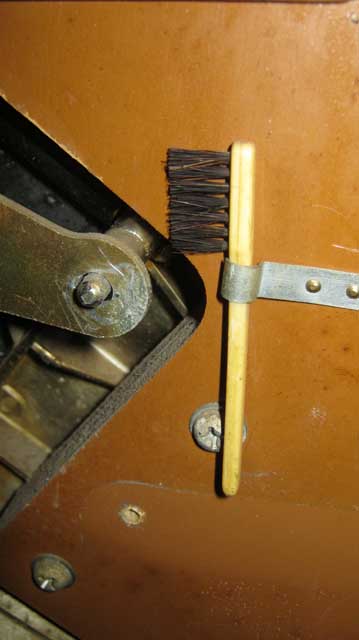
Bild 4 zeigt in der Ecke wo der Münzeinwurf sitzt zwei Schrauben. Die kleinere ist eine Blechschraube und hält den Rahmen der Glasscheiben vorne. Hier ist es die rechte Scheibe außen. Davon sind 5 Stück über die ganze Länge der Musikbox vorhanden, die alle raus müssen, denn jede hält jeweils einen Scheibenrahmen. Sonst geht letztlich der Diffuser nicht heraus. Die größere Gewindeschraube direkt daneben / darüber muss auch raus. Ich kann jetzt nicht mehr sagen ob das 4 oder 5 Stück sind, aber sie müssen raus.   Photo 4 shows two screws in the corner where the coin slot is located. The smaller one is a sheet metal screw and holds the front glass panel frame in place. Shown here it’s the right-hand panel on the outside. There are 5 of these screws along the entire length of the jukebox, and they all need to be removed, since each one secures a panel frame. Otherwise, the diffuser won’t come out. The larger threaded screw right next to it/above it also needs to be removed. I can’t tell now whether there are 4 or 5 of them, but they all need to be removed.

4.
HF00R Ausbau Grillscheiben

Jetzt kann man den Diffuser vorsichtig anheben. Vorher sollte man aber zuerst die Schraube von dem Scheibenrahmen aus der Lautsprecherwand drehen welchen man wechseln möchte. Jetzt erklärt sich auch warum man diese Schraube erst jetzt entfernt. Dadurch dass alle vorderen Rahmenschrauben entfernt sind wird die betreffende Schreibe instabil und kann seitlich weg kippen und so (weiter) zerbrechen. Achtung: Verletzungsgefahr.
Jetzt also den Diffuser zumindest anheben. Die Scheibe lässt sich mit Rahmen und nur mit Rahmen !!! etwas  !!! nach oben ziehen / schieben und dann heraus kanten. Das geht je nach Scheibe mal mehr und mal weniger gut. Ist es eine der Außenscheiben muss der "Trichter" links bzw. rechts auch ab. Das sollte eigentlich kein Problem darstellen. Gern fehlen diese Abdeckungen (Trichter) auch schon, weil es dem Aufsteller zu lästig war die bei ständigem Scheibenschaden ein- und auszubauen.

Achtung: die Glasscheiben sind mit Kit eingeklebt damit sie nicht klappern. Das Zeug geht nur schwer ab wenn nur die Scheibe ohne Rahmen getauscht wird. Hier hilft es oft das ganze warm zu machen.

Sollte an der Ersatzscheibe ein Scheibenrahmen mit dran sein, wirf den alten nicht weg. Es gibt sie zwar als Repro, aber wenn man die tauscht sieht man das wenn einer neu und die anderen alt sind. Somit ist so ein alter Rahmen immer noch für den Schrauber interessant, dem einer fehlt.
  Now you can carefully lift the diffuser. But first, you should unscrew the screw from the speaker panel’s frame on that side you want to replace. This explains why you should wait until now to remove this screw. Since all the front frame screws have been removed, the panel in question becomes unstable and can tip sideways, causing it to break (further). Caution: Risk of injury.

So now, at least lift the diffuser. The panel can be pulled/pushed !!! slightly !!! upward - with the frame and only with the frame - and then edged out. Depending on the panel, this works better or worse. If it is one of the outer panels, the “funnel” on the left or right must also be removed. This shouldn’t really be a problem. These covers (funnels) are often already missing because it was too much trouble for the operators to keep taking them on and off due to constant panel damage.

Note: The grille glasses are glued in place with sealant to prevent rattling. This sealant is difficult to remove if you’re replacing just the grille glass without the frame. It often helps to warm the whole thing up.

If the replacement grille glass comes with a frame attached, don’t throw the old one away. You can find reproduction frames, but if you replace them, you’ll notice the difference between the new one and the old ones. So an old frame like that is still useful for a mechanic who’s missing one.


HF100R Zubehör - Accessory

Nadelbürste an der Gehäuseinnenseite  –  extra needle brush inside cabinet
Photo: Thor Haugen
HF100R Nadelbürst


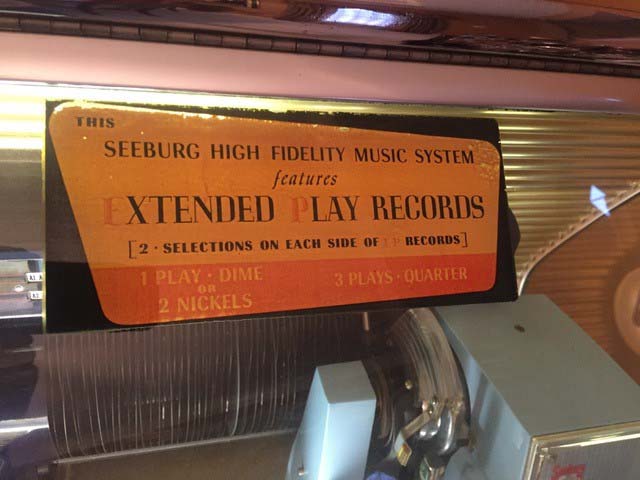
Werbeaufkleber für EP Singles  –  Decal to promote EP records
Photo: B. Karol
HF100R Nadelbürst


Booklet HF100R, reprint


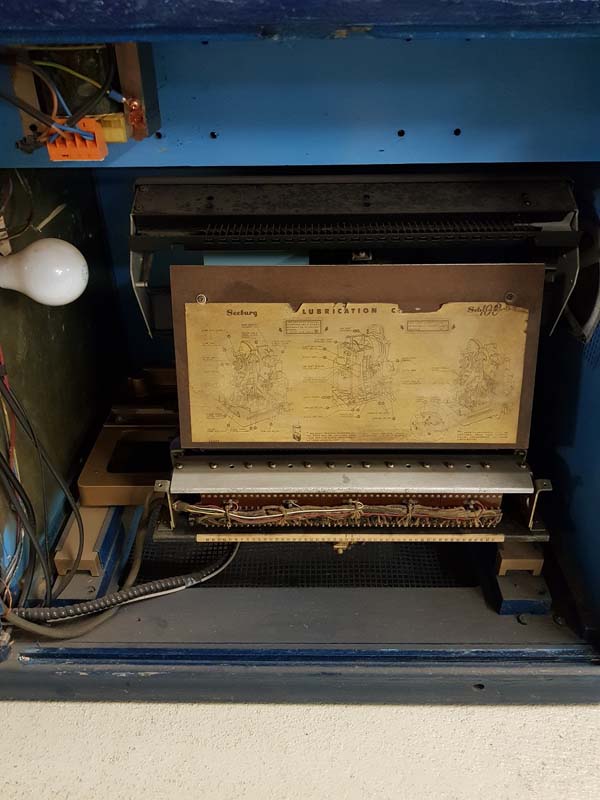
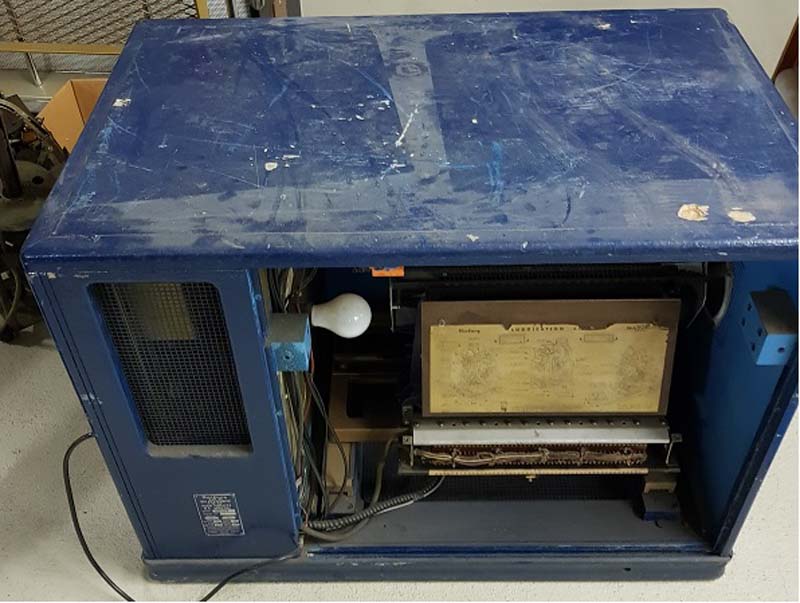
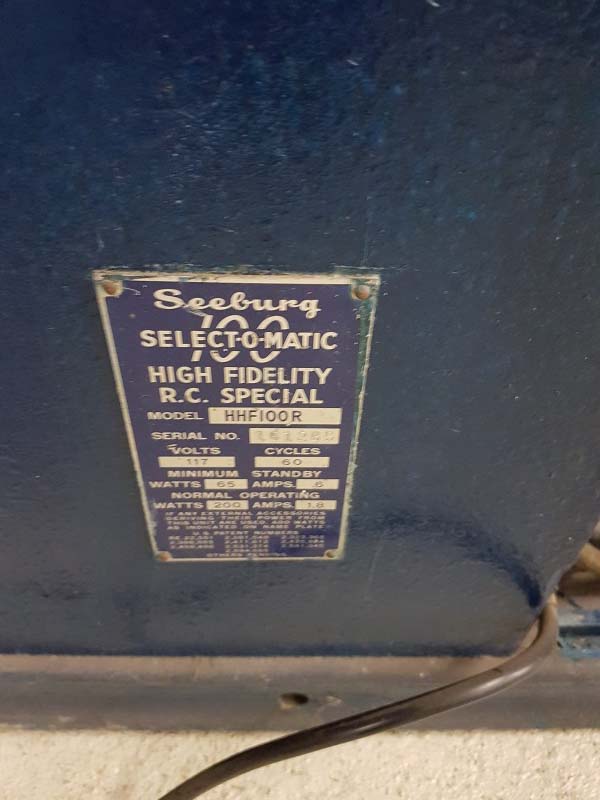
HHF100R (1954) - Hideaway

Fotos: Edgar S.
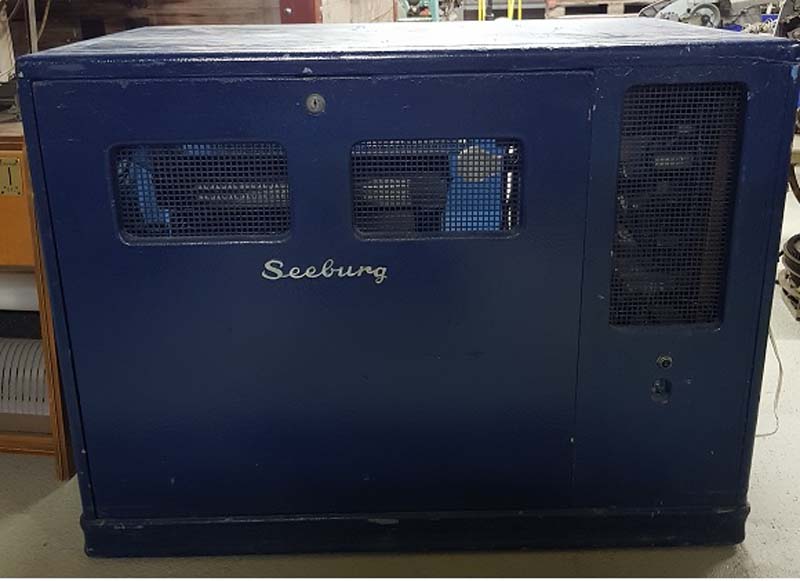
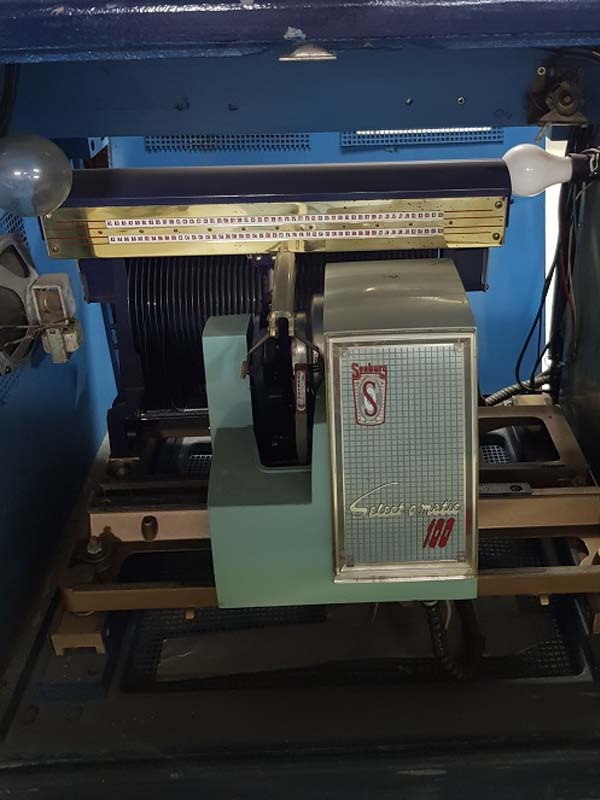
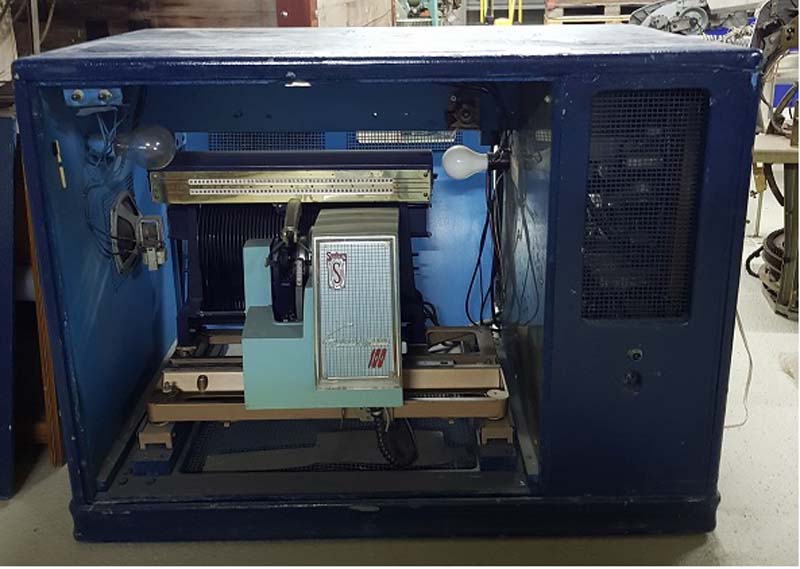
Seeburg HHF100R

Seeburg HHF100R

Seeburg HHF100R

Seeburg HHF100R

Seeburg HHF100R

Seeburg HHF100R


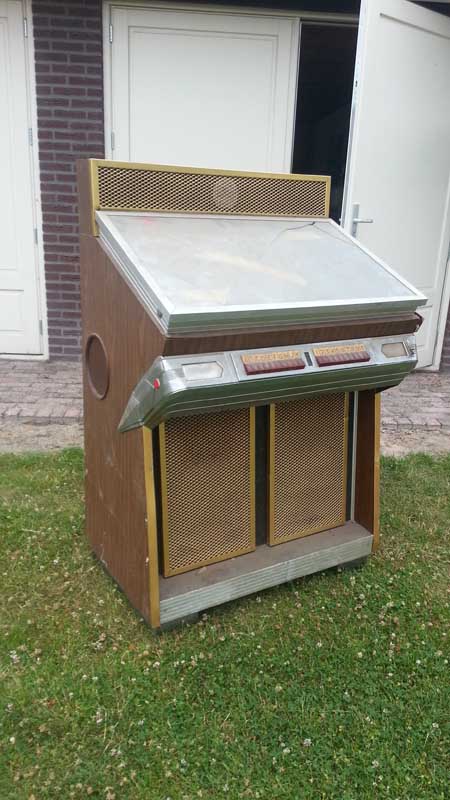
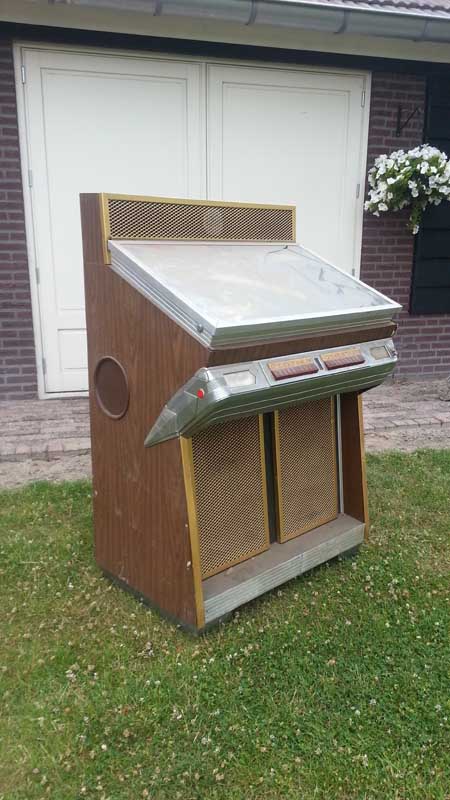
Aftermarket model based on a HF100R; manufacturer unknown

Model found in The Netherlands. Dutch or Belgium manufacturer?
If you can supply more details about this model, your EMAIL is welcome.

HF100R HF100R
 

Die Angaben haben keinen Anspruch auf Vollständigkeit oder Richtigkeit.
Bei den (importierten) Boxen können im Laufe der Jahre durchaus Veränderungen vorgenommen worden sein. Copyright.

<<<  zurück zur Archiv-Übersicht

Ein Service von
Jukebox-World Jukeboxen Jukeboxes Jukeboxparts Jukebox parts
Copyright by Stamann Musikboxen